Last updated November 18, 2026


Free written scope consultation - allowances, timeline, and change-order rules on paper before a single trade is scheduled
Driveway & Pavers Warning Signs Every Homeowner Should Know
The crack you can step over today is next year’s $6,000 base reconstruction – and it gave you three warning signs before it got there that most homeowners didn’t know to look for. Pavers rarely fail without notice. They sag, they rock, they push at the edges, they grow a white chalky film, and they puddle in the same spot after every storm. Each of those is a message. The problem is that most people read paver damage backwards: they wait for a broken stone or a big crack, then call someone. By the time a stone cracks, the failure has usually already moved into the base underneath. In the sections below, we’ll show you what to actually look for, what each sign means, and how to catch West Covina driveway problems while they’re still a weekend repair instead of a full rebuild.
Quick Answer
The most important paver warning signs are pattern cracking that traces straight lines across the surface, low spots that hold water hours after rain, edge rollout or corner lifting on the driveway border, and white mineral bloom that either wipes off (harmless) or flakes off with the stone surface (a real defect). Any single one of these on a West Covina driveway is worth inspecting in person within a few weeks, because the underlying cause is almost always a base or drainage problem, and base problems only get more expensive with time.
Styles & brands we work with
- Kitchen remodeling
- Bathroom remodeling
- Home additions & ADU
- Roofing
- Windows & doors
- Driveway & pavers
- Fence
Table of Contents
- The 60-Second Crash Course: What Pavers Actually Sit On
- Pattern Cracking vs. Hairline Cracks: How to Tell Them Apart
- Puddles and Low Spots: The Most Urgent Signal You’ll See
- Edge Rollout and Corner Lifting: Reading the Inches
- Efflorescence vs. Spalling: Benign Bloom or Warranty Issue?
- The Seasonal Inspection Calendar for West Covina
- Your Step-by-Step Annual Paver Inspection
- Repair Cost Timeline: Why Catching It Early Pays
The 60-Second Crash Course: What Pavers Actually Sit On
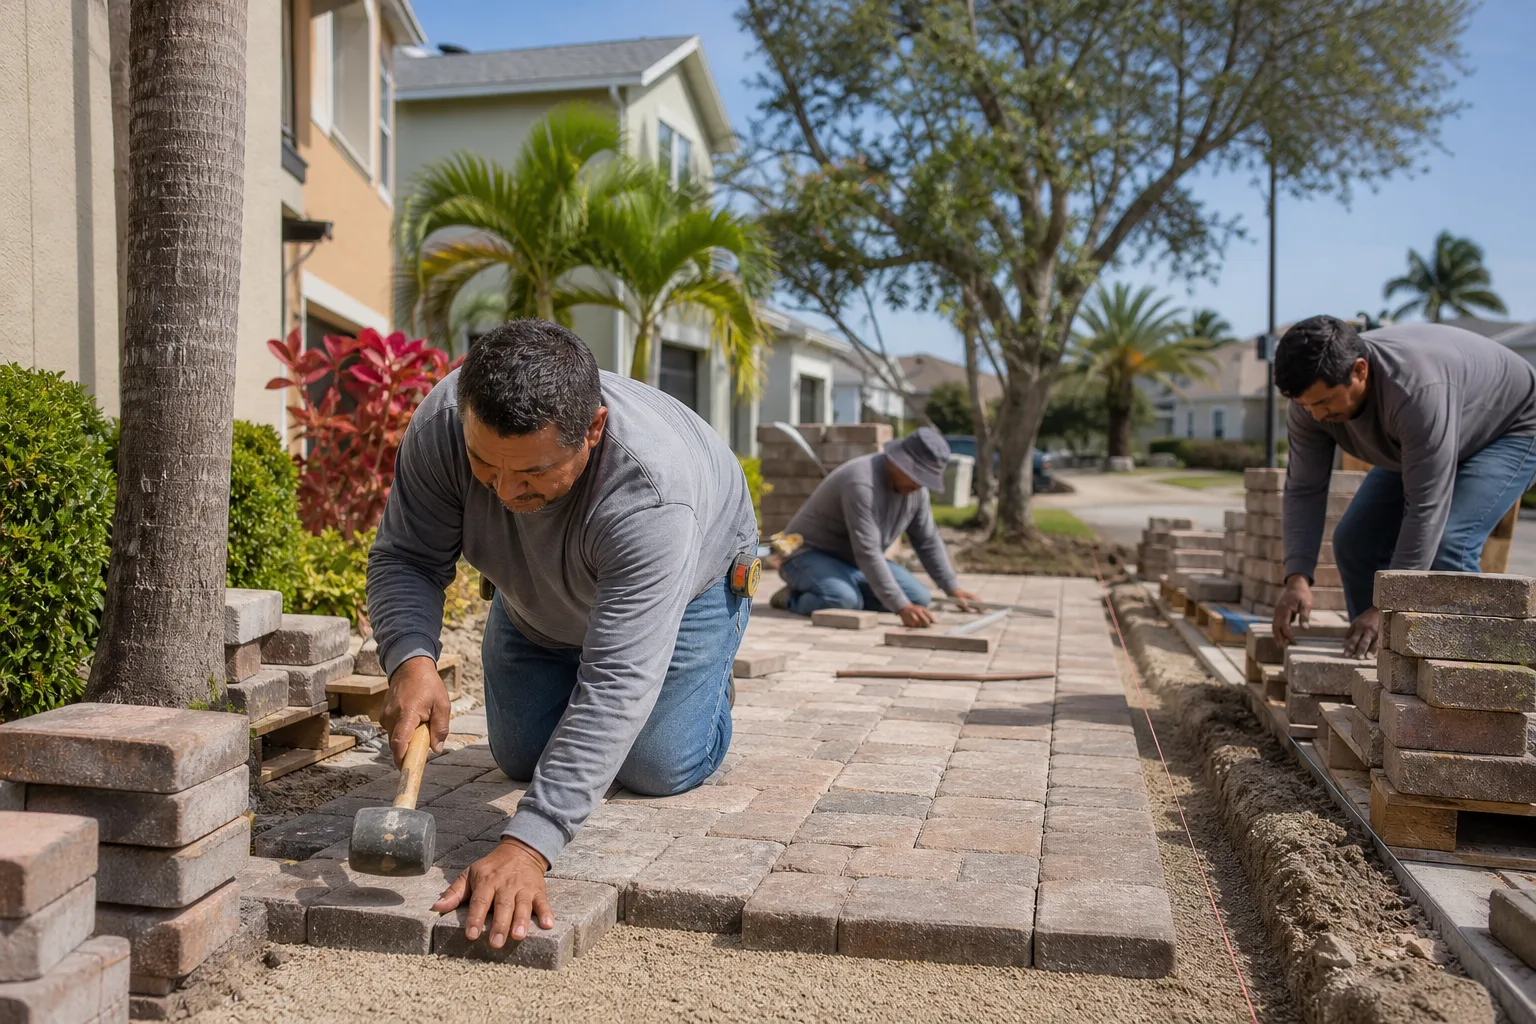
A paver driveway isn’t a paving slab. It’s a layered system, and the pavers are just the top of it. Underneath sits a compacted aggregate base, usually 4 to 12 inches depending on traffic and soil, and under that is the native soil your home was built on. In West Covina, that soil is often a dense clay that swells when it’s wet and shrinks when it dries. The pavers themselves are the strongest part of the whole structure. Almost every problem you’ll see on the surface started below it.
That matters because it changes how you read a warning sign. A cracked paver is not a “bad paver.” It’s usually a paver that was forced to bridge a void, or one being shoved from underneath by a base that moved. A water puddle is not a cosmetic flaw. It’s the base telling you it can no longer drain. And a lifted edge is not a border that came loose. It’s an edge restraint system that’s lost its anchorage. Once you understand that, the early signs become readable – and fixable – long before the system catastrophically fails.
Here’s how the layers stack, from bottom up:
- Native soil – in most West Covina neighborhoods, heavy clay with poor drainage
- Compacted aggregate base – the structural layer; 4 to 12 inches is typical
- Bedding sand – roughly 1 inch, leveled and screeded
- Pavers – the traffic surface; usually a minimum of 2-3/8 inches thick
- Edge restraints – the hidden “walls” that keep the pattern from spreading under load
- Polymeric joint sand or stabilization – locks the joints and slows water intrusion
When a professional lays pavers correctly, the whole system moves together. When one layer fails, the failures cascade upward, and each warning sign you’ll read below represents a different stage of that cascade. The earlier you spot one, the smaller the repair. Our team has seen this pattern play out across hundreds of driveway and paver projects, and the difference between a $400 fix and a five-figure reconstruction is almost always early detection. If you’re planning a new install and want the layered system done right the first time, see our Driveway & Pavers in West Covina page for the full build process.
Pattern Cracking vs. Hairline Cracks: How to Tell Them Apart
Every paver driveway gets hairline surface fissures eventually. On a West Covina driveway, our heat and sun cycles alone can produce thin cracks between joints within a few summers, and they’re not a reason to call anyone. The cracks that indicate base movement are different, and once you know what to look for, you can’t miss them.
Here’s what surface-level stress cracks look like: short, shallow lines that wander across a single stone or along a single joint. They usually sit in the middle of the driveway, not on the edges. You can’t fit a fingernail into them. They don’t point in any direction.
Here’s what pattern cracking looks like: cracks that run in straight lines across multiple pavers, usually at right angles to each other, as though a hidden grid is showing through. Imagine cracking tracing a rectangle on your driveway that doesn’t match the paver pattern at all. If you widened one with a coin and looked down inside, you’d see loose sand or empty space, not solid bedding. Any of the following combination is a base movement signature:
- Cracks that march in a straight line across the pattern, usually in two directions
- Cracks that circle around a “depression” or “dome” of pavers
- Pavers visibly lower in one zone than their neighbors, with cracks at the boundary
- Cracks that get wider in summer and narrower in winter (this is clay soil breathing)
- Cracks along both sides of a section that “moves” when you press on the middle
Pattern cracking means the pavers are no longer being supported evenly. The base has developed a void, a soft spot, or a slope failure, and the pavers are now failing like a concrete slab would. West Covina lots on clay increase the odds of this, especially if the install was built on insufficient base thickness before the soil was stable. In our experience, pattern cracking on a residential driveway is the single clearest “see a professional” sign, because the surface repair won’t hold without addressing the base underneath.
Puddles and Low Spots: The Most Urgent Signal You’ll See
A puddle sitting in the same spot 6 to 12 hours after rain has ended is an urgent structural signal on a West Covina driveway, not an aesthetic annoyance. Water is finding the lowest point in the system, and on heavy clay soil it has nowhere to go but down and sideways. The slope has changed. Something below has settled.
The reason this matters so much in West Covina specifically is the clay. Clay does two things to pavers that sand and loam don’t. First, it holds water against the base rather than draining it away; standing water on a driveway here gets into the base through the joints and stays. Second, clay expands and contracts with moisture – which means a driveway that starts to puddle after every rainy season will slowly flex its own base with each wet-dry cycle, opening the very joints that let more water in. It compounds.
Here’s what to look for after any significant rainfall:
- A puddle that doesn’t drain within 6 hours – the slope has failed, or the base has settled
- Sunken paver “islands” – pavers that dip below the surrounding plane, creating a bowl
- Water that runs toward the house instead of away – this one is urgent, since it moves the water problem against your foundation
- Mud at the joints – sand has washed out, leaving the pavers unsupported
- Water flowing out from under a joint – the base is saturated and pushing water up
If a puddle sits within three or four feet of your garage door or a slab foundation, we’d treat it as a same-month inspection item. Water against the base of your home in West Covina isn’t just a driveway problem; it’s a foundation concern. In our work across the area, we’ve seen small settling puddles turn into finished-grade damage more than once, and the fix at the puddle stage is a re-level and re-sand of one section, not a rebuild. If the puddle is draining toward your home and your lot is sloped, it’s also worth reading our guide on why foundation drainage matters to a house at large, covered in more depth on our Groundwork Construction Co. of West Covina home page.
Edge Rollout and Corner Lifting: Reading the Inches
Your paver driveway has hidden edge restraints – usually a plastic or metal edge, sometimes a concrete curb – that keep the pattern from spreading under traffic. When those restraints fail, the first thing you’ll see is the outer border pushing outward or lifting up. This is edge rollout, and it’s the earliest visible sign that a driveway is losing its grip.
The two inches that matter most here are 1 and 3. Here’s how we read them:
- Up to roughly 1 inch of rollout – the border pavers have moved outward or tilted. The edge restraint has lost some anchoring, but the interior pattern is usually still intact. This is the intervention point: reset the edge and the border courses, and the driveway keeps going.
- Around 2 inches – the border course is visibly separated from the field, and the joints behind it are opening. Sand loss is now following the edge. In West Covina heat, we see border courses on the sun-facing side of driveways move fastest.
- Around 3 inches or more – the interior pattern has almost certainly begun to shift. Corner pavers are lifting or rocking, and traffic is now stressing the interior field. This is no longer an edge repair; it’s a section removal and re-base.
You can check rollout from a standing position. Stand at the end of the driveway, sight down the border course, and look for a paver that sits proud of the line, or a corner that has lifted above the neighboring pavers. Press your foot on it. If the paver rocks under your weight even slightly, the edge restraint has failed somewhere below. A single rocking border paver is a small fix; a rhythm of rocking pavers running ten feet down one side is a signal that the edge has failed along its length. When it reaches the corner-lifting stage, that’s the moment to bring a professional in, because boundary failure almost always brings the interior pattern with it.
Efflorescence vs. Spalling: Benign Bloom or Warranty Issue?
That white, chalky film you sometimes see on pavers is called efflorescence, and it’s harmless in most cases. Spalling – the top surface of the paver actually flaking away – is not. The two look similar from ten feet away, which is why so many homeowners call us about a “damaged” paver that turns out to be a cosmetic surface deposit, or ignore a flaking paver that’s a legitimate warranty claim.
Here’s how to tell them apart before you call anyone. Rub a spot of the white film with a dry cloth or a stiff brush:
- Efflorescence – the film wipes away (or comes back slowly), and the surface under it is intact. This is mineral salt migrating to the surface as moisture moves through the pavers. It looks like a light chalky dust, usually after a wet spring. It comes back after water, then dries and fades. Nothing is structurally wrong.
- Spalling – the white or light-colored area comes off with a fingernail, a coin, or a brush, and leaves a rough, pitted surface behind. The top layer of the paver has separated from the body. This is a manufacturing defect or a freeze-thaw/moisture-related failure, and it is a warranty conversation, not a cleaning project.
The third thing to watch for is crumbling paver corners on the field pavers themselves, not just at the edges. A paver that’s crumbling from a corner outward along its face is different from one with a chipped edge from a car scuff. Crumbling is a signal of a defect or of alkali reaction inside the concrete, and it tends to spread. In our experience, a single spalled paver is rarely a one-and-done: the same mix on the same driveway tends to spall together, so check whether the neighbors on the same run have the same issue before you assume it’s a one-off.
Efflorescence returns most after a wet rainy season, which is why we recommend checking the driveway surface in early spring in West Covina. If a whited area stays put for weeks without rain and starts to feel rough rather than dusty under a fingernail, you’re looking at spalling, and it’s worth having a professional inspect while it’s still a localized area. Our guide to Fence Installation in West Covina touches on the same moisture-wicking problem in a different material – worth a read if you’re seeing weathering across the whole hardscape.
The Seasonal Inspection Calendar for West Covina
Spring and the weeks right after the rainy season are the most important inspection windows for a West Covina driveway, and the reason is water plus clay soil. Wet months open the joints, stress the base, and move small amounts of sand out of the pavers. Then summer heat arrives and dries everything out, freezing whatever movement happened in place. If you’re going to catch a problem while it’s still affordable, you catch it in March or April, after the last big storm has done its work.
Here’s the inspection calendar we recommend to homeowners:
- October: pre-winter walk – before the rainy season, look for settled pavers, opened joints, and areas where the sand has washed low. A bag of polymeric sand in late fall is cheap; a base repair in spring isn’t.
- Post-storm: the first 24 hours – after the first heavy rain of the season, walk your driveway and note every puddle. Photograph it. This is your baseline for the year.
- Post-storm: 6 hours later – revisit the puddles. If any are still holding water, that’s your structural flag. Check along the house and garage line specifically.
- March or April: post-season deep inspection – snow isn’t your issue in West Covina, but standing groundwater is. Do the full checklist below. This is the point where repairs are cheapest.
- July: peak-heat recheck – heat reveals new cracking and settlement fast. Re-scan for pattern cracks that appeared since spring and for any border pavers that have begun to lift.
After the first major West Covina storm of the season, we always recommend a specific post-rain look: walk the driveway within 4 hours of the storm ending, then again at hour 12 and hour 24. Whatever puddle is still there at hour 12 that wasn’t there last year is your inspection priority. Our team gets the most calls from West Covina homeowners in the two weeks after a real rain event, and the ones who act in that window consistently end up with smaller repairs than the ones who wait for summer.
Your Step-by-Step Annual Paver Inspection
This is the checklist we’d run on our own driveways. It takes 15 to 20 minutes, requires no tools beyond a screwdriver and your feet, and it will catch the same warning signs that signal a professional repair long before the damage gets into the base.
- Walk the perimeter first. Start at the street and walk the full border of the driveway with your eyes on the edge course. Look for pavers sitting proud of the line, corners lifted, or gaps between the border and the field.
- Read the edge. Press your foot down firmly on each corner paver. Note any that rock. Measure rollout by eye against the neighboring paver height; if any edge paver is over 1 inch proud, mark it.
- Sight lines across the field. Crouch at one end of the driveway and look down the length of the pattern. Any paver that stands out of the plane, or low, is a settled spot. Do the same from the side.
- Check the joints. Sweep a screwdriver handle (not the blade) along the joints between pavers. Loose or missing sand means water has been moving through. Look for joints wider than the day the driveway went in.
- Inspect the surface. Look for cracks. Tell hairline stress cracks apart from pattern cracks (straight lines crossing multiple pavers). Any pattern crossing means base repair, not surface repair.
- White-spot test. Any white bloom gets the fingernail test: rub it, then try to lift it with a fingernail. Wipes off = efflorescence; flakes off = spalling, and note the paver.
- Photograph everything. Photos of cracks next to a ruler, puddles at known time-points after a storm, and rolled edges at the same angle each season. A photo from March compared to the same photo from next March tells you more than either photo alone.
- Check drainage direction. Pour a bucket of water on the driveway near the house and watch where it goes. It should move toward the street or a drain, not toward your foundation or garage door.
If you find one flag, note it and recheck after the next rain. If you find two or more – say, a puddle plus a lifted edge, or a pattern crack plus a low spot – bring in a professional for an opinion. If you’re somewhere else in the process and thinking about an addition or new hardscape, our Home Additions & ADU in West Covina team can advise on how a new structure interacts with your existing driveway slab, drainage, and slope.
Repair Cost Timeline: Why Catching It Early Pays
Paver repair is not a linear cost. It’s a steep curve, and it gets steeper the longer you wait. The single biggest driver of driveway repair cost isn’t the pavers themselves – it’s how much of the base has to come up. Here’s how a small problem grows if you leave it alone:
- Stage 1: Hairline cracks, slight settling, occasional efflorescence – a re-sand of the joints and a spot check. This is maintenance-scale work.
- Stage 2: Puddles that hold water, a rocking border paver, one low spot – a localized lifting of one section, re-leveling the bedding layer, re-compacting, resetting the pavers, and re-sanding. Still a manageable repair.
- Stage 3: Pattern cracking across a section, edge rollout at 2-3 inches – a section of pavers comes out, the base is re-graded and re-compacted, edge restraints are reset, and the section is re-installed. This is where a full professional job is required; a surface patch will fail.
- Stage 4: Multiple sections failing, base voids, water running toward the house, damaged pavers spread across the driveway – full driveway reconstruction: removal, base rebuild, new pavers, new restraints. This is the “next year’s $6,000 base reconstruction” scenario.
Every step from one stage to the next is driven by the same thing: how many square feet of base have to come up. Water and clay do that. Sun and traffic don’t. If you’re in West Covina and your driveway has started to puddle, the cheapest possible move is the inspection call, because it lets you choose the stage you want to fix at. That’s the core logic behind every driveway and paver guide we publish, and it’s also the reason we route hardscape calls through the same upfront pricing process the rest of our work runs on – the number you get is the number you pay, and a written quote makes it plain without a moving target. Repairing early hasn’t changed the price of the estimate; it’s just given you the cheapest possible option set. For context on how exterior work fits together, our fence installation guide for West Covina covers the parallel problems moisture creates at the perimeter of a property, including where fence posts and paver borders meet.
Common Mistakes to Avoid
- Treating a puddle as “just cosmetic.” A puddle that holds water for half a day means the slope has failed – and in West Covina clay, that water is already working its way into the base. It’s a structural signal every time.
- Filling cracks with caulk or paver repair liquid. Surface fill hides the sign without fixing the cause. On a base-failure crack, the repair material will pop off by the next rainy season – and the base void will have grown.
- Pressure-washing a white-bloom driveway at full blast. Aggressive washing on a spalled paver can rip more surface off and spread the damage. Light pressure, low nozzle, and a proper patio cleaner is the safer approach.
- Assuming the pavers themselves are “bad” when they crack. In almost every cracked-paver case we’ve looked at, the pavers were fine and the base beneath them was the problem. Ordering replacement pavers without diagnosing the base is the most expensive mistake in this list.
- Waiting until summer to “get around to it.” Heat stops the water problem temporarily and hides the settling. West Covina’s dry season is exactly when warning signs go quiet, which is why the post-rain window is the one to use.
- Ignoring a single rocking border paver. One edge paver that rocks underfoot is the first sign of edge restraint failure. It’s cheap to reset now; it’s a section removal once the field pavers behind it start moving.
- Chopping out a paver to “see what’s underneath” and not reseating it. Once a paver is lifted and not properly reset with new bedding sand and a joint seal, water intrusion at that exact spot begins. Note the paver location, photograph it, and leave the field to a professional.
See the difference
 Before
 After
 Before
 After
 Before
 After
When to Call a Professional
Some of these warning signs are worth a call and some aren’t, and we’d rather tell you which is which than have you chase a hairline crack with a checkbook. Call a professional if you see any of the following: a puddle that holds for more than 6 hours after rain, especially near the garage or house line; a border course that’s rolled out past 1 inch or has multiple rocking pavers; pattern cracks running in straight lines across two or more pavers; a section that’s visibly lower than its neighbors with a drop you can step down; or any spot where the pavers have started to visibly flex underfoot as you walk. Each of these is a base-level problem, and the repair at this stage is section work, not reconstruction. If you’re seeing spalling that’s spreading across multiple pavers on the same run, that’s a warranty conversation worth having while the affected area is still small. Groundwork Construction Co. of West Covina offers free estimates in West Covina – call (844) 662-2335 and we’ll walk the driveway with you, photograph what we see, and give you a written, upfront quote that won’t change once work begins.
Frequently Asked Questions
Most localized paver repairs in the West Covina market fall in the low hundreds to low thousands depending on how much base has to come up, with section-level repairs where base rebuilding is required costing more than single-paver resets. The single biggest cost driver is how much of the compacted base has failed. The cheapest possible quote comes from discovering the problem early, when a section can still be reset without touching the rest of the driveway. Call (844) 662-2335 for an exact quote – estimates are free.
It means the slope that was built into the driveway has changed, most often because the base underneath has settled or the clay soil has expanded and dropped during a wet season. A puddle sitting against the house line is urgent because it moves water toward the foundation rather than away. On a West Covina lot with dense clay, a puddle is a signal to act on, not a cosmetic detail. Call (844) 662-2335 and we’ll assess the slope in person before the problem spreads.
Surface stress cracks are short, shallow, and usually isolated to a single paver or joint, while base-failure cracks run in straight lines across multiple pavers in the pattern and often form a grid on the surface. If you can insert a coin into the crack and see loose sand or empty space below, the base has moved. Pattern cracking means the repair isn’t a surface fix; it’s a base fix. Call (844) 662-2335 for a free walk-through if you’re not sure which you’re looking at.
Yes, and the reason is that clay soil expands when wet and shrinks when dry, so a paver base built on clay needs deeper excavation, more thorough compaction, and a proper sub-base aggregate that isolates the pavers from the clay’s movement. Driveways installed with shallow bases on clay are the ones we see fail first. A written scope that specifies base depth and compaction is what separates a driveway that lasts from one that settles in five years. Call (844) 662-2335 to review your driveway or a new install.
Efflorescence is a white mineral dust that wipes off with a dry cloth and never damages the surface, while spalling is a flaking or rough area where the top layer of the paver comes off under a fingernail or stiff brush and leaves a pitted spot. Efflorescence returns after wet weather and fades; spalling stays and spreads. Spalling across multiple pavers on the same run is worth a professional inspection and, if the pavers are new, a conversation about warranty. Call (844) 662-2335 for a free inspection.
Re-sanding joints is a reasonable DIY maintenance task on a healthy driveway, but re-leveling pavers or attempting a base repair is not a project to tackle without experience, because a poorly compacted base will fail on the first wet season. The pavers aren’t the hard part; the compaction underneath is. If the driveway has puddles, a lifted edge, or pattern cracking, that’s a professional repair, and getting it done right the first time is cheaper than doing it twice. Call (844) 662-2335 for a free estimate.
The Bottom Line
Your driveway gives you warning signs long before it fails. Puddles that hold water, pattern cracks that march in straight lines, border pavers that rock or lift, and spalled surfaces that flake instead of wipe are all messages from the base underneath – and on West Covina’s clay soil, those messages get louder every wet season. Read them early, photograph them, and check the driveway after the first major storm each year. The difference between a section repair and a full reconstruction comes down to the season you act in. If you’re seeing any of the warning signs in this guide, call (844) 662-2335 for a free estimate. We’ll walk the driveway with you, put the findings in writing, and give you an upfront quote with no surprises. Built to last, backed in writing.
Written by the team at Groundwork Construction Co. of West Covina.