Last updated November 18, 2026


Free written scope consultation - allowances, timeline, and change-order rules on paper before a single trade is scheduled
Driveway & Pavers Maintenance Schedule: What to Do and When
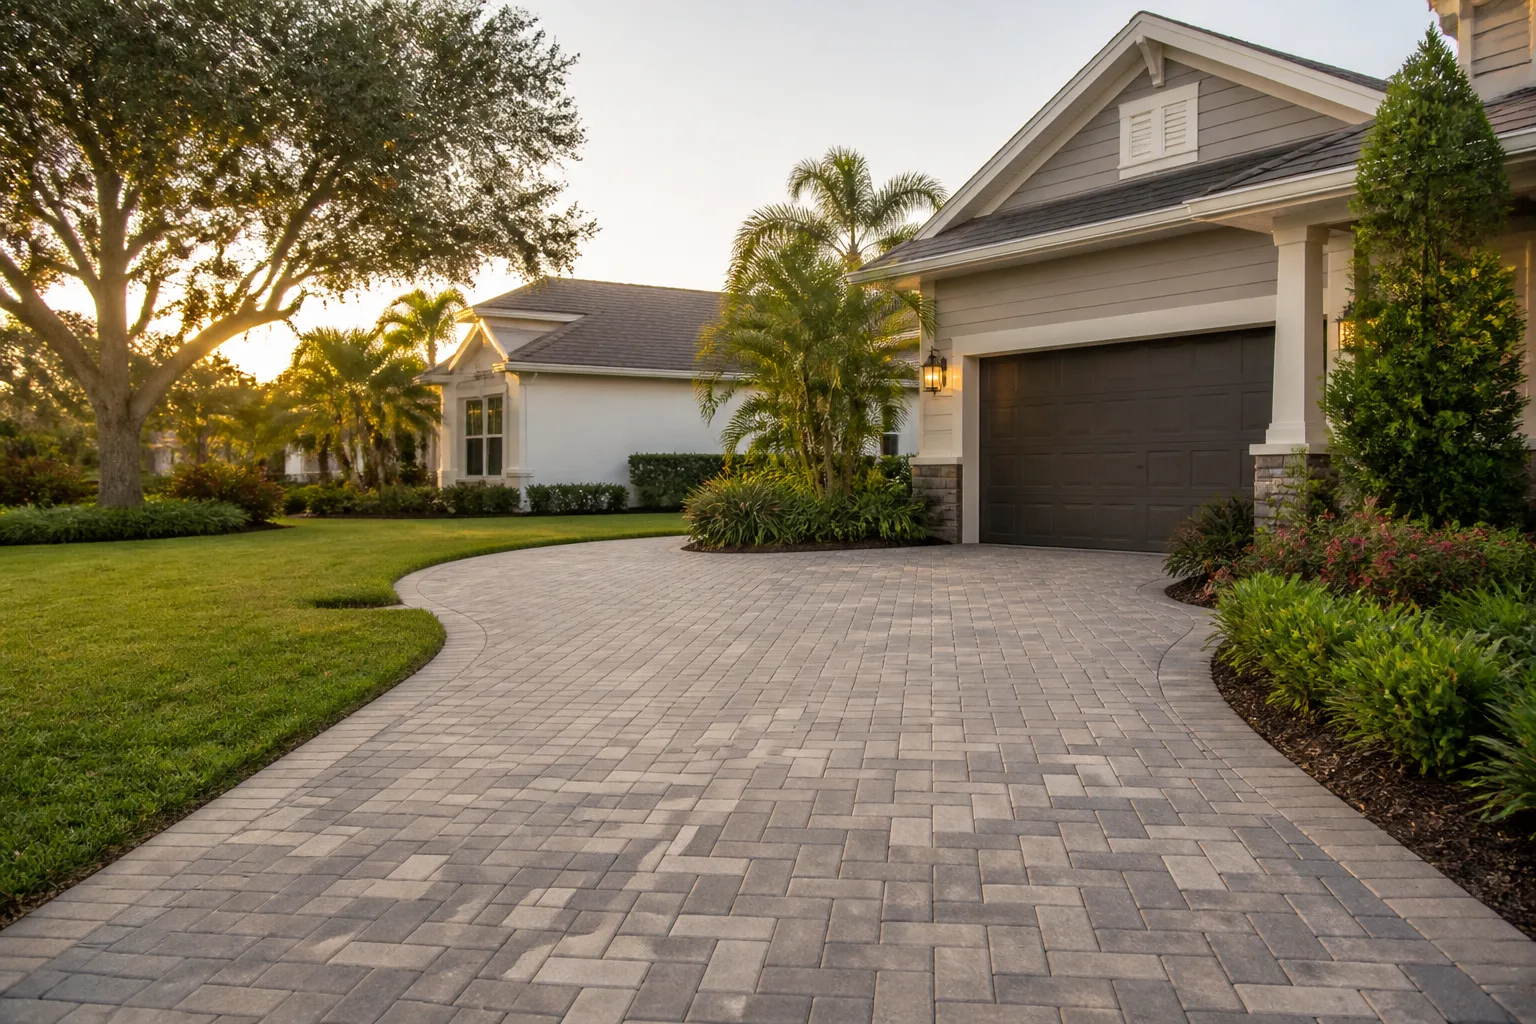
Sealing pavers at the wrong time of year does more damage than not sealing them at all, and most homeowners find this out after spending $400 on a product that trapped moisture underneath. We’ve pulled up slabs in West Covina where a summer seal job locked water into the base, and by February the pavers were rocking like loose teeth. This guide is different from the generic cleaning calendars you’ll find online. It’s a decision-based framework built around West Covina’s actual seasons: dry summers that bake the surface, wet winters that test your joints, and daily traffic patterns that wear specific zones faster than others. Here’s what to do, when to do it, and why the timing matters more than the product.
Quick Answer
A paver driveway in West Covina needs three things done at the right intervals: joint sand replenishment every 18 to 24 months, cleaning two to three times a year, and sealing every three to five years during a dry, warm window when the surface stays below 90°F and moisture has fully left the base. Skip the sand and the pavers shift. Seal too early in the season and you trap moisture. The monthly checklist below tells you exactly what to look at and when.
Styles & brands we work with
- Kitchen remodeling
- Bathroom remodeling
- Home additions & ADU
- Roofing
- Windows & doors
- Driveway & pavers
- Fence
Table of Contents
- The Right Sealing Window for Southern California
- Month-by-Month Maintenance Calendar for West Covina
- Joint Sand Replenishment: How to Know When It’s Gone
- Oil, Fluid, and Sealer Stains: What Actually Removes Them
- The Annual Inspection Checklist
- Edge Creep, Low Spots, and Drainage Slope Changes
- Do All Pavers Need the Same Schedule?
The Right Sealing Window for Southern California
Sealer needs two conditions to cure correctly: the pavers must be dry to the core, and the surface temperature needs to stay under 90°F through the entire cure window. In West Covina, that rules out July and August for most applications. You’ll see surface temps hit 120°F to 140°F on a sunny afternoon in those months, which flashes the sealer off before it bonds and leaves a milky haze you can’t easily remove. It also rules out the wet season, when trapped moisture under a fresh seal turns into a vapor bubble by the next dry spell.
The practical window from our experience:
- Best: Late March through May, or late September through early November. Ground is dry, air temps stay in the 70s to mid-80s, and cure time is predictable at 24 to 48 hours.
- Workable: Early March if you’ve had a run of dry days and the base has drained. Check the weather forecast for 72 hours before you commit.
- Not recommended: June through August, and any window within 48 hours of rain or with a relative humidity above 70%.
The moisture test we use on-site: tape a 2×2-foot square of clear plastic to the pavers in the morning, and check it the next morning. If condensation has formed on the underside of the plastic, there’s moisture still in the base. Wait another week. West Covina’s clay-heavy soils hold water longer than the sandy grades you’ll find in Fontana or Rancho Cucamonga, so don’t assume the paver surface being dry means the base is dry. That distinction is the single most common reason a seal job fails here.
If your driveway also involves grading or drainage rework, this is the moment to check whether the slope still reads correctly against the house. Our Driveway & Pavers in West Covina page covers what proper base prep looks like before the surface ever gets sealed.
Month-by-Month Maintenance Calendar for West Covina
The dry-summer/wet-winter rhythm in Southern California means your maintenance tasks don’t line up with the national guides you’ll find online. Here’s the schedule we walk homeowners through:
January – February (Wet Season)
This is inspection time, not work time. Walk the driveway after every significant rain and look for puddling that lasts more than 24 hours. Persistent puddling means a low spot has formed and the base is settling. Clear debris from the lowest point and any nearby drain. Don’t seal, don’t add sand, don’t pressure-wash heavily. Just observe and note.
March – May (Sealing and Repair Window)
Once the last major rain passes and you’ve had a solid week of dry weather, this is your window for joint sand replenishment, stain removal, and sealing. Aim to be done before the first 95°F day. Most jobs in West Covina finish cleanly by mid-May.
June – August (High Heat)
Keep the driveway clear of standing water from sprinklers and wash-downs, and avoid sealing. Light sweeping is fine. If you have tree sap or berry staining, deal with it now before the sun bakes it in. Check the edges where the driveway meets landscaping; this is when small weeds show up in depleted joints.
September – November (Second Sealing Window)
Once the summer heat breaks, generally late September through early November, you get a second good window to seal. This is often the better choice for a driveway that took a beating over the summer, because you’re sealing just ahead of the wet season when the surface is at its driest.
December (Pre-Winter Prep)
Final sweep, clear gutters and downspouts that drain across the driveway, and get a photo of the entire surface for comparison next spring. If you spot a paver lifting or a joint that’s washed out, get it repaired before the heavy rain arrives.
If your property has fencing along the driveway edge, tie your winter prep to the same walk-around. Our Fence Installation in West Covina team often flags drainage issues from the fence side that the driveway side hasn’t shown yet.
Joint Sand Replenishment: How to Know When It’s Gone
Polymeric sand is what locks the pavers together laterally and keeps water from digging out the base. When it’s intact, the joints look filled and firm. When it’s depleting, you’ll see the following signs in this order:
- The joints look shallower than they used to. New polymeric sand sits about 1/8 inch below the paver surface. When it’s worn to a quarter inch or deeper, it needs topping off.
- Water pools in the joints briefly after rain. That means the sand’s surface tension has broken down and it’s no longer repelling water.
- Individual pavers start to rock. This is the structural warning. Once pavers move independently, the sand has lost its interlock and the base is starting to shift.
- Weeds are growing from joints regularly. They’re growing in the void, not in the sand. Vacant joints are weed habitat.
- You can push a screwdriver blade into a joint by hand. At this point the sand has essentially failed and needs a full replacement, not a top-off.
What happens structurally if you ignore it: water gets past the joints, the bedding layer compacts unevenly, and pavers settle at different rates. This is where the low spots, edge creep, and eventually cracked pavers come from. A $300 sand replenishment delays a $4,000 to $8,000 base repair. That’s the actual math.
Replenishment is a two to three hour job on a typical 400-square-foot driveway. In West Covina, the best time is the same March-to-May and September-to-November windows as sealing. If your joints are depleted by more than a third of their depth, a full re-sand before sealing is the right order of operations. Seal over depleted joints and you’ve sealed the voids shut, and the next wet season finds the weak point.
Oil, Fluid, and Sealer Stains: What Actually Removes Them
Vehicle fluids are the most common stain call we get, and the wrong response – scrubbing with a stiff brush and a household degreaser – can push the stain deeper or strip the sealer in a patch that never matches. Here’s what actually works, broken out by stain type:
- Motor oil: Absorb what you can with kitty litter or sawdust within the first hour. For the residue, a poultice of baking soda and water left covered for 24 hours pulls the oil out of the pore. Then rinse. Don’t scrub.
- Power steering and brake fluid: These are more solvent-like and will lift sealer quickly. Rinse with plenty of water first, then follow with the same poultice. Get to it within the day or the sealer patch will be permanently uneven.
- Transmission fluid: The red dye is stubborn. A dedicated paver cleaner formulated for oil-based stains is usually required. Test on a spare paver or a hidden corner first.
- Rust from patio furniture or a parked trailer: Oxalic acid-based cleaners work on rust specifically. Follow the label dilution; over-strength acid will etch the paver surface.
- Failed sealer (milky haze, peeling patches): This is a strip-and-reseal job, not a spot clean. Chemical strippers formulated for your specific sealer type are the only reliable removal path, and this is heavy work.
One interaction most homeowners miss: a solvent-based sealer applied over oil contamination will lift the oil to the surface and lock it in. Always fully remove fluid stains before the next seal cycle. If you’re not sure what’s in a stain, photograph it and ask before you touch it. Our team at Groundwork Construction Co. of West Covina home fields these calls regularly and can usually identify the cause from a photo.
The Annual Inspection Checklist
Once a year, ideally in early fall before the wet season, walk the driveway slowly and check every item below. Twenty minutes with a notepad catches the problems that become expensive if you wait.
- Edge line integrity. Follow the perimeter on both sides. Any paver that moves when you push it gently has lost restraint. Note its location.
- Low spots. Pour a bucket of water across the driveway and watch where it pools. Any puddle larger than a dinner plate that doesn’t drain within an hour is a settling issue.
- Drainage slope. Stand at the house and sight along the surface toward the street. Water should shed away from the foundation in a consistent fall. If the line looks flat or has reversed near the garage apron, that’s a base problem, not a surface problem.
- Joint depth. Pick five spots at random and push a screwdriver into the joint. If you can push past a quarter inch, schedule re-sanding.
- Paver surface condition. Look for chips, cracks, or spalling. A single cracked paver in a traffic zone usually means base failure underneath, not just a bad paver.
- Sealer condition. Water should bead on the surface if sealed. If it soaks in evenly across the driveway, the sealer has worn through and you’re due for a reseal in the next good window.
- Weed and vegetation pressure. Note which joints sprout first; that’s where sand is thinnest.
- Efflorescence. White mineral haze on the surface is normal in wet years and usually clears on its own. Persistent efflorescence means water is moving through the pavers and out the surface, which is worth investigating.
Photograph each item. A year-over-year photo set is the single best tool for spotting a slow problem before it becomes a visible one. West Covina’s homes on sloped lots especially benefit from this, since drainage patterns change subtly as the base settles and landscaping grows.
Edge Creep, Low Spots, and Drainage Slope Changes
Edge creep is when the pavers along the perimeter start spreading outward, away from the field. You see it as a widening gap between the last row of pavers and the edge restraint, or as individual pavers tipping slightly outward. Left alone, edge creep is a direct path to base failure, because once the edge loses restraint, water gets under the field and washes the bedding layer out toward the street.
The three things that cause it here in West Covina:
- Failed edge restraint. If the original install used plastic edge restraint that’s cracked or lifted, the pavers have nothing to push against.
- Tree root pressure. Ficus and other aggressive roots common in local landscaping push against pavers from below and lift edges from the side.
- Vehicle weight concentrated at drive aprons. The apron where the driveway meets the street takes a disproportionate load from turning tires, and that’s usually where creep starts.
Low spots form for the same reasons: base compaction loss, water infiltration, or root activity. The fix depends on depth. A shallow low spot (quarter inch or less) can sometimes be corrected by lifting and re-bedding individual pavers. Anything deeper means the bedding layer itself has failed in that zone and the proper fix is to pull up a section, re-grade, and re-compact.
Slope changes are the most serious of the three. If water has started flowing toward the house or garage instead of away from it, that’s not a maintenance item, it’s a repair with a time limit on it. Ten minutes of standing water at the foundation during a storm is a water intrusion risk. Have a professional look at it before the next rainy season. If your driveway is attached to a home addition project, factor slope corrections into the plan from the start; our Home Additions & ADU in West Covina team handles grading and drainage as part of larger site work.
Do All Pavers Need the Same Schedule?
No. The material changes the maintenance cadence, and using the wrong product on the wrong paver is one of the more expensive mistakes we see.
- Concrete pavers: The default in most West Covina driveways. Seal every three to five years, re-sand every 18 to 24 months. Standard schedule applies.
- Clay brick pavers: More porous, so they hold moisture longer. Sealing every two to three years is more realistic, and you need a breathable, penetrating sealer rather than a film-forming one. Clay brick under a film sealer in a wet year can spall.
- Travertine and natural stone: Common on pool decks and driveways on higher-end properties. Requires penetrating sealers only; surface sealers trap moisture and cause efflorescence. Check the sealer’s compatibility with the specific stone.
- Permeable pavers: Installed specifically to let water drain through, so sealer is usually the wrong call entirely. Keep the joints clear and skip the sealer.
- Stamped concrete (not pavers but often confused with them): Joint sand replenishment doesn’t apply. Reseal every two to four years depending on UV exposure and traffic.
If you don’t know what your pavers are made of, a photo and a quick call to our team usually identifies them. It’s the same call where we can give you a straight answer on brand and material options; we work with a curated set that includes Belgard, Boral, and Atlas, along with materials from other vetted partners, so you’re choosing based on fit, not inventory.
Common Mistakes to Avoid
- Sealing in July. Surface temps hit 120°F to 140°F on a West Covina driveway in mid-summer. The sealer flashes off before it cures, leaves a haze, and won’t bond. Wait for a cooler window.
- Sealing right after rain. If your base is holding moisture from the last storm, sealing traps it. Use the plastic-sheet test before you commit. Trapped moisture means peeling, bubbling, and a full strip job within two years.
- Pressure-washing at full pressure. A 3,500 PSI wand at close range blasts polymeric sand out of the joints and can pit the paver surface. Use a wide fan tip and moderate pressure, and re-sand after any real cleaning.
- Top-dressing polymeric sand over a depleted joint without cleaning. New sand won’t bond to old, dirty sand. Remove the old layer to a consistent depth and clean the joint before reapplying.
- Ignoring a rocking paver. A single rocking paver is a base problem, not a paver problem. If you replace the paver without addressing the base, the new one will fail in the same spot within a season.
- Using driveway concrete sealer on pavers. It’s the wrong product for the joint system and will lock water at the wrong layer. Use only sealer formulated for pavers or stone, matched to the material.
- Sealing over an oil stain. Any residual oil lifts to the surface and locks in permanently under a fresh seal. Remove the stain completely, then seal.
See the difference
 Before
 After
 Before
 After
 Before
 After
When to Call a Professional
Most of the routine maintenance on this page is homeowner-friendly: sweeping, inspecting, absorbing spills, and photographing the driveway once a year. Call a professional when you hit any of the following:
Multiple pavers are rocking or have shifted more than a quarter inch. Water is draining toward the house or garage instead of away. You’re seeing edge creep of half an inch or more along the perimeter. Sealer has failed in patches and needs stripping and resealing. You want to re-sand joints but you’re not confident about the sand formulation, the joint depth prep, or the cure window. Polymeric sand installation has real technique to it, and getting it wrong means doing the job twice. On a paver surface over 400 square feet, the time and equipment cost of DIY usually exceeds the value of the labor you save.
Groundwork Construction Co. of West Covina offers free estimates in West Covina. Call (844) 662-2335 to schedule yours. Our technicians have up to 12 years of experience with paver systems, and every project is covered by our 730-Day Done Right Promise. Calls are answered by a live person 24/7, and technicians arrive background-checked and in uniform.
Frequently Asked Questions
Every three to five years for concrete pavers, every two to three for clay brick, and every two to three years for stone. The determining factor is how fast the surface stops beading water after rain. Once water soaks in evenly across the driveway instead of beading, you’re due, no matter what the calendar says. Call (844) 662-2335 for a free estimate on reseal or full paver evaluation.
Late March through May, or late September through early November. Both windows give you dry surface conditions with air temps that stay under 90°F through the cure. Avoid June through August; the West Covina heat flashes sealer off before it cures. If your base has been holding moisture, wait for a full dry week before you start.
Yes, with some care. Use a wide fan tip (25 degrees or broader) at moderate pressure, keep the wand moving, and don’t hold it in one spot. Aggressive pressure strips polymeric sand out of the joints and can pit the paver face. If water starts flowing out of the joints during the wash, back off. Re-sand any depleted joints after the wash, and plan to reseal within 60 days if you’ve had to re-sand.
Small repair jobs, edge creep correctives, and spot re-sanding typically run a few hundred dollars; full-base repairs on a section run considerably more. The exact range depends on square footage, paver type, and whether the base needs re-grading. We give written line-item quotes so you know what you’re paying for before any work starts, and our Upfront Pricing policy means the number you see is the number you pay. The free estimate is the fastest way to get a real number.
Nothing catastrophic in year one. But by year three to five, you’ll see joint sand depletion, weed pressure, darker staining from oil and organic debris, and faster base settling from water infiltration. The pavers won’t fail on their own, but every other system underneath them will need more work. A neglected paver driveway in West Covina typically needs base repairs roughly a decade before a maintained one does. Sealing isn’t cosmetic; it’s the layer that protects the structure.
No. A rocking paver means the bedding layer underneath has settled unevenly. Adding sand to the joints will fill the void without correcting the base, and the paver will resume rocking within a wet season. True repair requires lifting the paver, re-grading the bedding layer, re-compacting, and reinstalling. Anything less is a delay, not a fix. Call (844) 662-2335 for a free estimate on base evaluation.
The Bottom Line
A paver driveway that gets inspected annually, re-sanded every 18 to 24 months, and sealed every three to five years in the right season will outlast a neglected one by 20 years in West Covina’s climate. The three things that matter most: seal in spring or fall, never in summer or right after rain; re-sand before you seal, not after; and treat a rocking paver as a base warning rather than a cosmetic flaw. Most of the schedule is homeowner-friendly work, and the parts that aren’t (resealing large surfaces, base repairs, edge restraint rebuilds) are worth calling on before they become expensive. Groundwork Construction Co. of West Covina offers free estimates, written line-item quotes, and every project protected by our 730-Day Done Right Promise. Call (844) 662-2335 to schedule yours; calls are answered by a live person 24/7.
Roofing, windows, and driveway work often go together on the same property, and pairing projects is a smart way to consolidate scheduling. We work with trusted brand partners across all seven of our service lines, from GAF and CertainTeed on roofs to Andersen and PGT on windows, so material choices are consistent across the scope.
Written by the team at Groundwork Construction Co. of West Covina.