Last updated November 18, 2026

Free written scope consultation - allowances, timeline, and change-order rules on paper before a single trade is scheduled
Home Additions & ADU Troubleshooting: Common Problems and How to Fix Them
When a new addition starts showing ceiling cracks within a year, most people blame the drywall contractor. But the actual cause is usually a foundation connection detail that was underbuilt six months earlier and nobody caught it. The same pattern shows up in ADU projects across West Covina: the visible symptom rarely matches the root problem. A ceiling crack isn’t a drywall failure. A foggy window isn’t a window defect. A cold back bedroom isn’t a thermostat issue. This guide walks you through diagnosing the real source of seven common addition and ADU problems, from moisture intrusion and HVAC failures to structural cracks and contractor abandonment, so you can stop chasing symptoms and start fixing what’s actually broken.
Quick Answer
Most home addition and ADU problems trace back to an underspecified scope of work, not a single bad trade. Moisture problems usually come from roof-to-wall flashing or foundation transitions, HVAC failures from undersized ducts and skipped load calculations, and ceiling cracks from foundation connection details that were underbuilt. Fixing the real source costs far less than repeatedly patching the symptom.
Styles & brands we work with
- Kitchen remodeling
- Bathroom remodeling
- Home additions & ADU
- Roofing
- Windows & doors
- Driveway & pavers
- Fence
Table of Contents
- How to Trace Moisture Intrusion Back to Its Real Source
- Why Your New Addition Feels Too Hot or Too Cold
- Why a Passed Inspection Doesn’t Mean the Work Is Right
- What to Do When Your ADU Project Stalls Mid-Construction
- Settling Cracks vs. Structural Movement Cracks
- How to Write a Scope of Work That Prevents Problems
- West Covina Permit and Code Realities for Additions and ADUs
- The Owner’s Walkthrough Checklist for a New Addition
How to Trace Moisture Intrusion Back to Its Real Source
Moisture is the most misdiagnosed problem in every addition and ADU project we’ve seen in West Covina. Homeowners find a water stain on a ceiling or a soft spot along a baseboard and immediately call a drywall or paint contractor. Those trades will seal the symptom and move on. Six months later the stain returns, the paint bubbles, and the real source has now been feeding a slow leak for an entire rainy season.
In our experience, water intrusion in a new addition has three common sources, and they’re each in a different building assembly. You can narrow it down with a methodical approach before you call anyone:
- Check the roof-to-wall flashing first. This is where a new addition roofline meets the existing house wall. If the flashing was lapped backward, sealed only with caulk, or never had kick-out flashing at the gutter terminus, water will track down the wall cavity and show up far from the point of entry.
- Inspect window and door rough openings. The rough opening is the framed gap before the window goes in. If the opening was framed too tight, the window buck bowed, or the sill pan was omitted, every wind-driven rain event will push water behind the frame. This is common on Andersen and Marvin window installs where the opening tolerance was rushed.
- Look at foundation transitions. Where the new slab or raised floor meets the existing house, if the step-up detail was underbuilt or the waterproofing membrane was lapped wrong, moisture climbs by capillary action. This shows up as soft baseboards or a persistent musty smell in the room closest to the connection.
West Covina’s dry summers and wet winters mean a flashing defect can hide for months and then reveal itself all at once during the first heavy rain. If you’re seeing a ceiling stain in the fall, trace it back to a summer installation. If you’re seeing it in February, the leak may have been there since the fall and only now reached the drywall surface.
What to Ask Before Any Repair
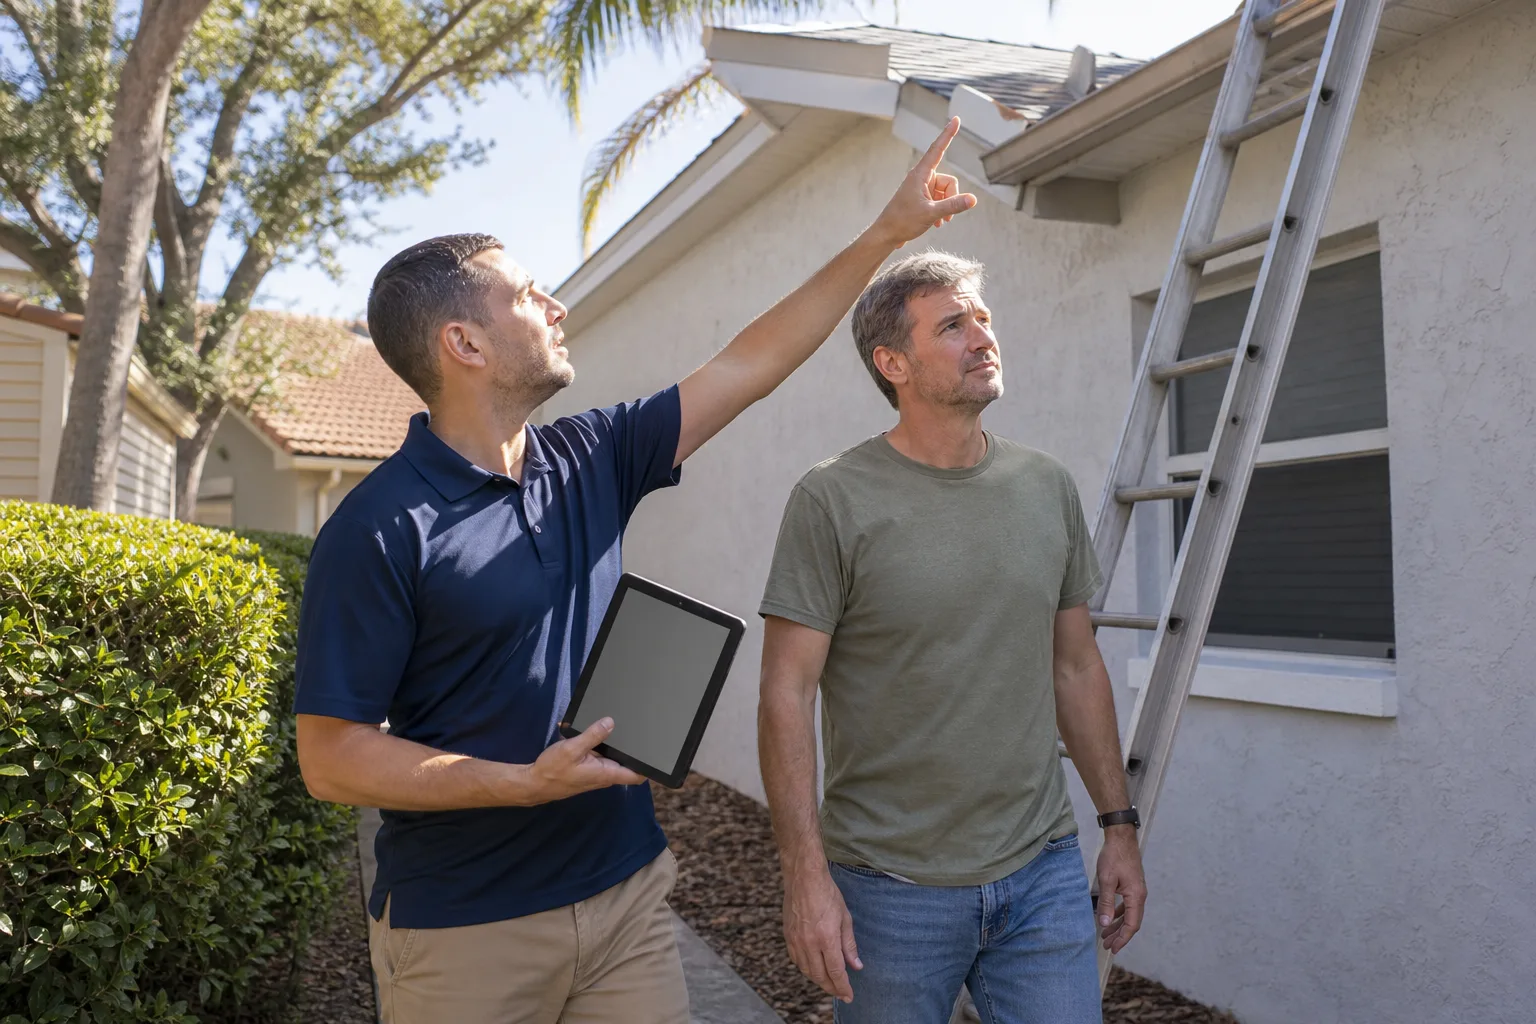
Before you authorize a repair, ask the contractor to identify the point of entry, not just the point of damage. A good crew will pull back the drywall and show you the flashing detail, the window sill pan, or the foundation transition. If a contractor wants to seal, paint, and call it done without opening the assembly, that’s the repair that comes back. Our Home Additions & ADU in West Covina team treats every moisture call as a diagnostic first and a repair second.
Why Your New Addition Feels Too Hot or Too Cold
If your addition is consistently five to ten degrees warmer or colder than the rest of the house, the problem is almost never the thermostat. It’s duct sizing and load calculation. Here’s what’s actually happening in most of the failed HVAC calls we see on West Covina additions.
Every HVAC system needs a Manual J load calculation, which is the industry method for sizing heating and cooling to the actual building envelope. When a general contractor runs a new duct from the existing system to a new room without updating that calculation, three things go wrong at once. First, the new square footage adds load the original equipment wasn’t sized for. Second, the duct run itself gets sized by eyeball instead of by cubic feet per minute. Third, the supply and return balance gets thrown off, so the new room gets starved of conditioned air while the original rooms get too much.
The Questions That Force a Real Fix
When you call an HVAC contractor about an underperforming addition, ask these questions up front. The answers separate the technician who will fix it from the one who will sell you a bigger unit:
- “Did you run a Manual J load calculation for the addition, or are you using the original house load?” A real fix starts with the calculation.
- “What’s the cubic feet per minute for the new duct run, and how does it compare to what the room needs?” If they can’t quote a number, they didn’t size the run.
- “Where’s the return-air path for the new room?” A supply without a return is a pressure problem, not a temperature problem.
- “Are the ducts running through unconditioned attic space or conditioned space?” Ducts in West Covina’s hot attics lose a meaningful percentage of their cooling before it reaches the register.
The fix in most cases is not a bigger AC unit. It’s duct redesign: adding a properly sized run, installing a return path, and in some cases adding a mini-split or zone damper to give the addition its own control. On a West Covina ADU where the unit is detached or shares a wall with the main house, a dedicated mini-split is often the right answer because it sidesteps the load-balancing problem entirely.
Brand Considerations
If you’re specifying equipment during the build, brand choice matters less than the load calculation and install quality. A well-installed Ameristar system with proper sizing will outperform a premium brand that was sized on a guess. Ask your contractor to show you the Manual J report before the equipment is ordered.
Why a Passed Inspection Doesn’t Mean the Work Is Right
This is the least understood reality in residential construction: a passed inspection means the work met the minimum code standard at the moment of inspection. It does not mean the work was done to a high standard, and it does not mean it will perform well over time. Building inspectors are legally limited to verifying code compliance, not workmanship quality. They check that the framing has the right nailing pattern and the right hold-downs. They don’t check that the framer took the extra time to crown the joists or shim the subfloor.
The gap between “passed inspection” and “done right” is where most of the complaints on new additions and ADUs originate. A West Covina homeowner who relies entirely on the inspection process to catch problems is going to catch the code violations but miss the craft issues that cause failures five years later.
What Inspectors Don’t Catch
- Flashing detail quality: Inspector verifies flashing is present. Inspector may not verify it was lapped in the correct direction.
- Duct sealing: Inspector verifies ducts are connected. Inspector usually does not pressure-test the duct system for leakage.
- Window installation: Inspector verifies windows are rated, anchored, and flashed. Inspector rarely checks the sill pan condition or the shim quality that determines whether the window operates smoothly in year three.
- Foundation connection: Inspector verifies tie-in hardware is installed. Inspector does not verify the bolt torque or the detail that prevents differential settling.
- Insulation installation: Inspector verifies insulation R-value is present. Inspector does not catch compression, gaps, or thermal bridging that cut the effective R-value in half.
The Owner’s Job at Walkthrough
You need your own checklist. Before final payment, walk the addition yourself and check the things the inspection process can’t. This is what separates homeowners who are still happy with their addition in year ten from the ones who file complaints in year two.
What to Do When Your ADU Project Stalls Mid-Construction
A stalled construction project is one of the worst positions a homeowner can be in. The foundation is poured, the framing is up, the money is partly spent, and the contractor has stopped showing up. In West Covina and across Los Angeles County, this happens more often on ADU projects than on traditional additions because the ADU lending, permitting, and construction phases are longer and the contractor’s cash flow is more exposed.
Here are the exact steps to take, in order, when a project stalls mid-construction. Do them in sequence, because each step affects the next.
- Document the state of the project in writing. Send the contractor a dated email or certified letter listing exactly what work has been completed, what has been paid for, and what remains. This creates the paper trail you need later. Photograph everything.
- Stop paying. Do not pay for work that hasn’t been performed. If you’re on a draw schedule, release only for verified completions.
- Check for liens before you hire anyone else. Subcontractors and suppliers who weren’t paid by the original contractor can file mechanic’s liens against your property. Order a preliminary title report or check with the LA County Recorder to see if any liens have been recorded. You need to know your exposure before you sign a new contract.
- Verify the original contractor’s license status. Look them up through the Contractors State License Board. If the license is suspended or they’re in disciplinary action, that changes your options, including whether you can pursue the state’s contractor recovery fund.
- Get the permit file. Pull the building permit record from West Covina’s building department. You need to know exactly which inspections have passed and which are outstanding. A homeowner who takes over a stalled project inherits the permit obligations, and a new contractor needs to know what was signed off.
- Find a licensed contractor who will take over someone else’s work. This is the hardest step. Many contractors refuse to inherit liability for another crew’s framing or foundation. Look for a contractor who will do a full structural review before quoting, who will re-inspect the completed phases, and who will carry the warranty on the full project. A company that offers a real workmanship guarantee, like our 730-Day Done Right Promise, is telling you they’ll stand behind the whole scope even when part of it wasn’t their work.
- Notify your lender and your insurance. If the ADU is financed, the lender needs to know the project is stalled. If the property is unsecured and exposed to weather or theft, your insurance carrier needs to know as well.
If you’re facing a stalled ADU in West Covina, you don’t have unlimited time. Unfinished framing exposed to a full rainy season will have to be re-inspected or replaced. Get a licensed contractor out to walk the project before the weather does more damage.
Settling Cracks vs. Structural Movement Cracks
Not all cracks are a problem. Some are a normal part of a building finding its equilibrium in the first year. Others are the earliest warning of a foundation or framing issue that will only get bigger. Knowing the difference saves you from paying for a structural engineer on a cosmetic crack, and it also saves you from ignoring a serious one.
Here’s how to tell them apart. Take a photo of every crack you see, measure it, and log the location. Then compare what you’re looking at against these descriptions.
Cosmetic Settling Cracks (Usually Not Structural)
- What they look like: Hairline cracks, typically under 1/16 inch wide. They appear at the corners of door frames and window openings, at drywall seams, or where the ceiling meets the wall. They don’t shift the door or window they’re near.
- Where they show up: Most often in the first 12 to 18 months after construction, as the framing dries out and shrinks slightly.
- How they behave: They stop growing. Measure in month six and month twelve; if the width hasn’t changed, it’s cosmetic.
- The fix: Standard drywall repair and repaint. No structural work required.
Structural Movement Cracks (Get an Engineer)
- What they look like: Diagonal cracks that run from a corner outward, wider than 1/8 inch. Stair-step cracks in exterior stucco or brick that follow the mortar joints at a 45-degree angle. Cracks that widen at one end and taper at the other.
- Where they show up: Exterior walls, in the corners of the addition where the new structure meets the existing house, or above a large opening like a sliding door.
- How they behave: They grow. You measure at month one, month three, and month six, and the width increases each time. Doors and windows that opened easily six months ago now stick or won’t latch.
- The fix: This is the crack pattern that requires a structural engineer’s assessment. The likely causes are undersized footings, a missing foundation connection at the addition-to-house transition, or expansive soils that were not accounted for in the original design.
West Covina sits on soils that vary significantly from one neighborhood to the next, and additions built on the edge of a slope or on older fill lots tend to see more movement. If you see a diagonal crack wider than a credit card edge, don’t paint over it. Call for an inspection.
How to Write a Scope of Work That Prevents Problems
Nearly every problem in this guide traces back to a scope of work that was never specific enough. Not a bad contractor, not a bad crew, not a bad material choice. A vague scope. When the scope says “install windows” instead of “install (specific model) double-hung window, (specific size) rough opening, flashed with (specific flashing product), sill pan included, shimmed and anchored per manufacturer,” you’ve handed the contractor the latitude to do the minimum. And the minimum is what causes the failures that show up a year later.
Here’s the structure of a scope of work that eliminates most of the problems we see in West Covina:
- Materials by name and model, with quantities. Not “Andersen windows” but “Andersen 400 Series (specific size) double-hung windows, quantity (N).” Not “fence” but “Bufftech (specific style) vinyl fence, (specific linear footage), (specific post spacing).”
- Every building assembly spelled out. Roof to wall: flashing detail, material, laps, kick-out at gutters. Window openings: rough opening tolerance, sill pan, flashing sequence. Foundation: footing size, anchor spacing, waterproofing, drainage.
- Every trade’s responsibility listed. Who frames the duct chase? Who cuts the hole in the ceiling? Who patches after the electrician? If it’s not itemized, it’s a change order.
- A written change-order process. Every change is documented, priced, and signed before work proceeds. A contractor who works by phone call is a contractor who will surprise you at invoice time.
- Specific inspection points. Name the inspections that must pass before the next phase starts. Foundation before framing. Framing before insulation. Insulation before drywall. Rough MEP before close-up.
- A closeout checklist. Punch list, final inspection, warranty document, material care instructions, as-built drawings. All of it in writing.
A scope written this way costs a little more upfront to develop. It saves multiples of that during construction and in the years after. When we quote a project in West Covina, the line-item scope is part of the estimate, not an afterthought. Upfront pricing with no change-order surprises is the only way we work.
West Covina Permit and Code Realities for Additions and ADUs
West Covina’s ADU regulations track California’s statewide rules but with local review timing and requirements that catch out-of-area builders by surprise. If you’re planning an addition or ADU in West Covina, plan for these realities.
- ADU permit streamlining applies, but site-specific review still happens. State law limits how the city can deny an ADU, but grading, drainage, and utility connection reviews still apply. A hillside lot near the San Jose Hills or a lot with an existing drainage easement will take longer.
- Plan check turnaround is measured in weeks, not days. Expect multiple review cycles if the drawings are incomplete. The most common cause of delay is missing structural calculations for the roof-to-wall connection and the foundation anchoring detail.
- SoCal Edison service upgrades are a common bottleneck. Adding an ADU with its own electrical service, or upsizing a panel from 100 to 200 amps, usually requires a utility coordination step that the building permit itself doesn’t cover. Start that conversation early.
- Fire separation requirements apply to detached and attached ADUs. Depending on proximity to the property line and adjacent structures, you may need fire-rated assemblies on certain walls. This is a scope item, not a change order that appears later.
- Solar readiness is standard. New construction and additions over a certain size trigger solar-ready requirements. If your addition is on the edge, plan for it in the electrical scope.
Pull permits, pull them on time, and pass inspections. The alternative costs more in the long run, and it complicates the future sale of the property. Every project we do in West Covina gets permits pulled and inspections passed before the final walkthrough.
Related Projects
If your addition project involves site work, pairing it with a proper driveway and drainage upgrade is often the smart move. Our Driveway & Pavers in West Covina team handles the site grading and hardscape that keep rainwater away from your new structure’s foundation. Fencing is the other common companion project, so your new ADU has its own defensible boundary. Our Fence Installation in West Covina team installs Jerith, ActiveYards, and Bufftech fence lines that match the property’s finish standard.
The Owner’s Walkthrough Checklist for a New Addition
Final walkthrough is your last chance to catch problems while the contractor still owns them. Bring a flashlight, a level, a tape measure, a phone for photos, and this checklist. Walk the addition with the project lead, not just the salesperson.
- Open and close every door and window. They should operate smoothly with no binding. A door that sticks on first open will stick worse in six months.
- Check the ceiling-wall joint in every room. Look for separation, cracks, or texture differences that suggest a patch was made.
- Run every plumbing fixture. Hot water at the sink. Flush every toilet. Run the shower for two minutes. Check under each sink for weeping connections.
- Test every electrical outlet and switch. Plug in a phone charger and cycle through. Note any that don’t work or are wired backward (test with a plug-in tester).
- Feel the airflow at every HVAC register. Hold a tissue up to each one. Every supply should move the tissue. No supply should be notably weaker than the others.
- Look behind the baseboards at the exterior walls. Any discoloration, soft spots, or musty smell is a moisture indicator.
- Inspect the roofline from outside with binoculars. Look for lifted shingles, flashing that’s not properly lapped, and any visible gap at the addition-to-house transition. GAF and CertainTeed shingles should sit flat with clean lines.
- Look at the foundation transition from the exterior. Follow the line where the addition meets the original house. Any crack, gap, or settling visible at the finish grade line needs explanation before final payment.
- Confirm the punch list in writing with an agreed timeline and an agreed retainer of final payment against completion.
Any item on this list that the contractor won’t stand behind is worth a conversation before the final check clears. A company that backs its work with a real written workmanship warranty, like our 730-Day Done Right Promise, is going to walk this checklist with you rather than resist it. Built to last, backed in writing, applies to the walkthrough as much as the materials.
Common Mistakes to Avoid
- Accepting an oral change order. If it’s not in writing and signed, it’s a dispute waiting to happen. The change order is the record. West Covina additions that drag into disputes almost always trace to verbal agreements about who would cover the cost of a framing or foundation adjustment.
- Choosing the lowest bid without a line-item scope. The cheapest bid is often a scope that says “framing” without specifying lumber grade, spacing, or hold-downs. It’s not cheaper; it’s the same house with less house in it.
- Skipping the Manual J calculation on an addition. Every added square foot changes the load on the whole system. Skipping the calculation guarantees a comfort problem in the new room.
- Relying on inspections to catch workmanship problems. Inspectors verify code. They don’t verify quality. You need your own walkthrough checklist.
- Not checking for liens before hiring a replacement contractor. A stalled project with undisclosed subcontractor liens can stick to your property. Order a title check before signing the next contract.
- Painting over a structural crack. A diagonal crack wider than 1/8 inch is the start of a real conversation, not a drywall repair. Paint hides the evidence you’ll need for a claim.
- Waiting to call when a project stalls. Every week the project sits open, the framing, drywall, and exposed connections degrade. In West Covina, one rainy season on an unfinished structure can turn a mid-construction problem into a teardown-and-rebuild problem.
See the difference
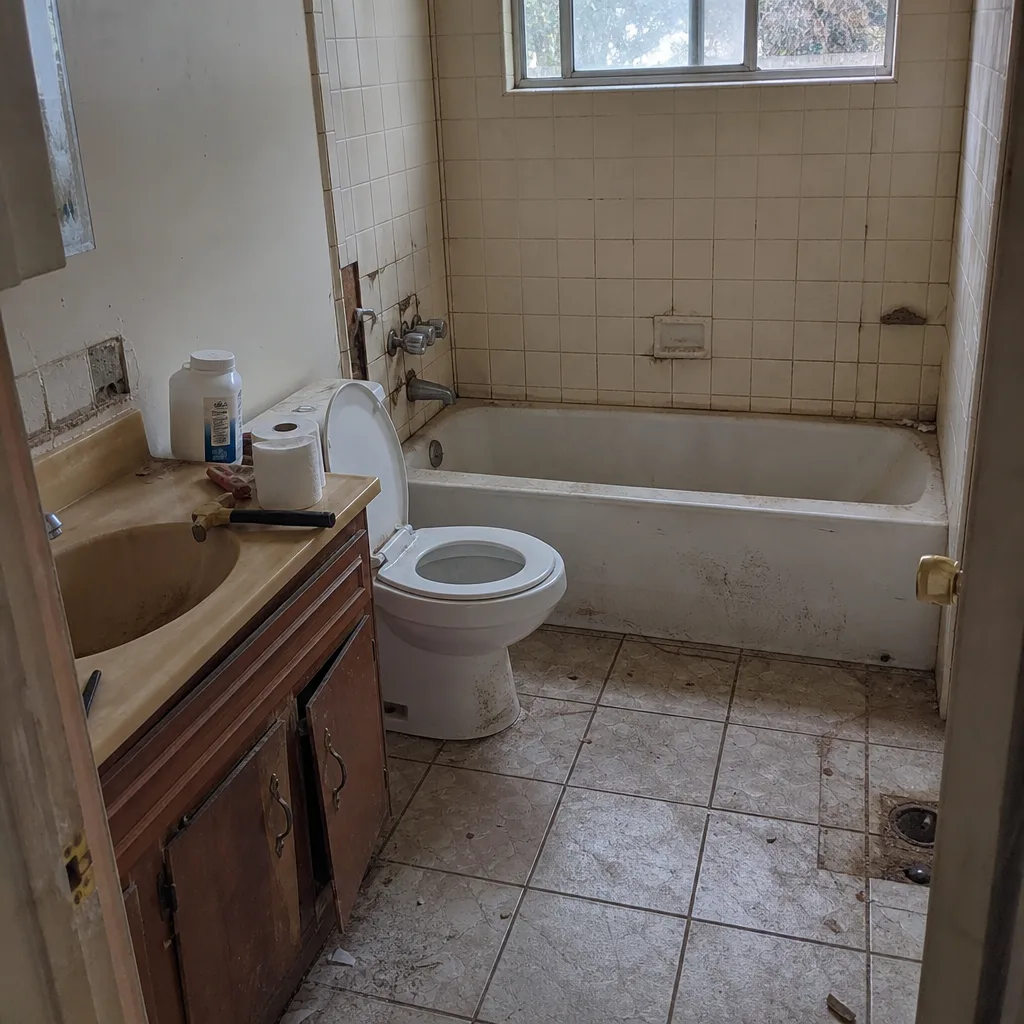 Before
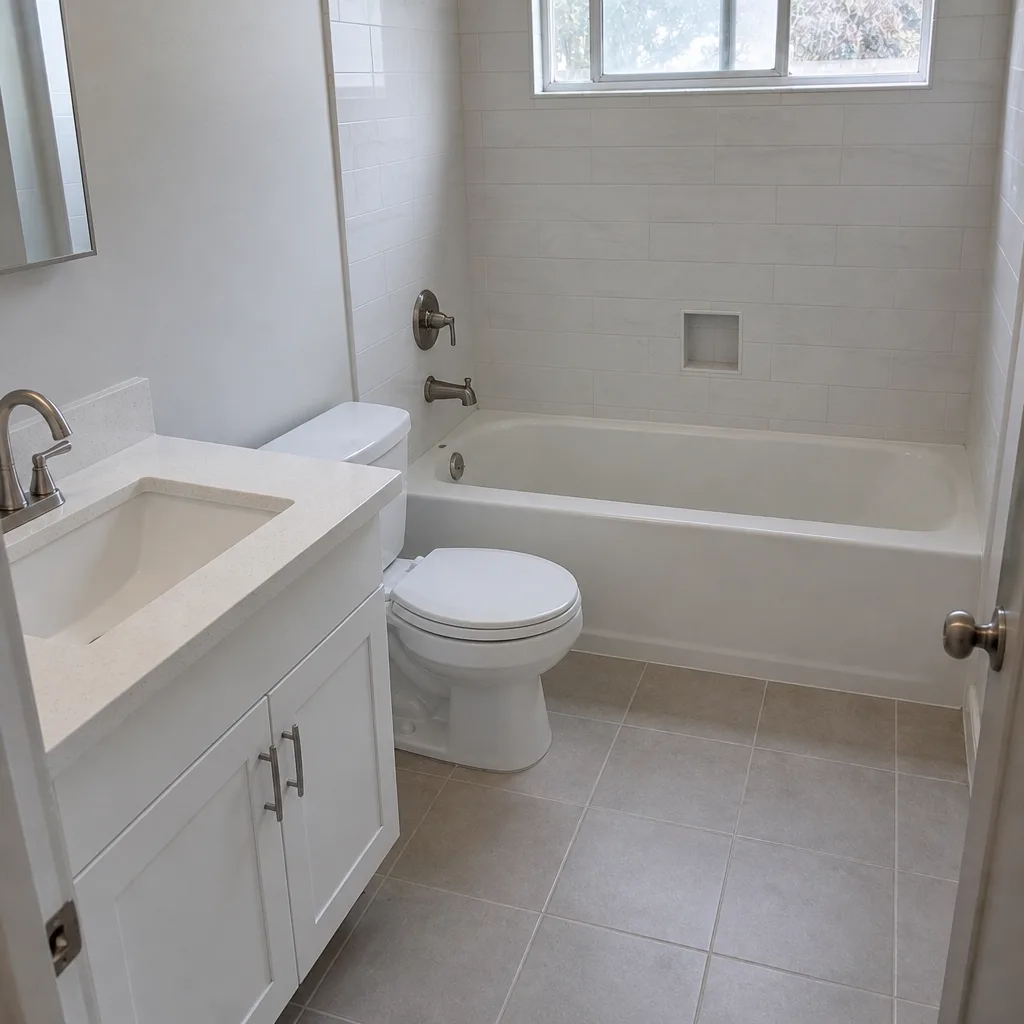 After
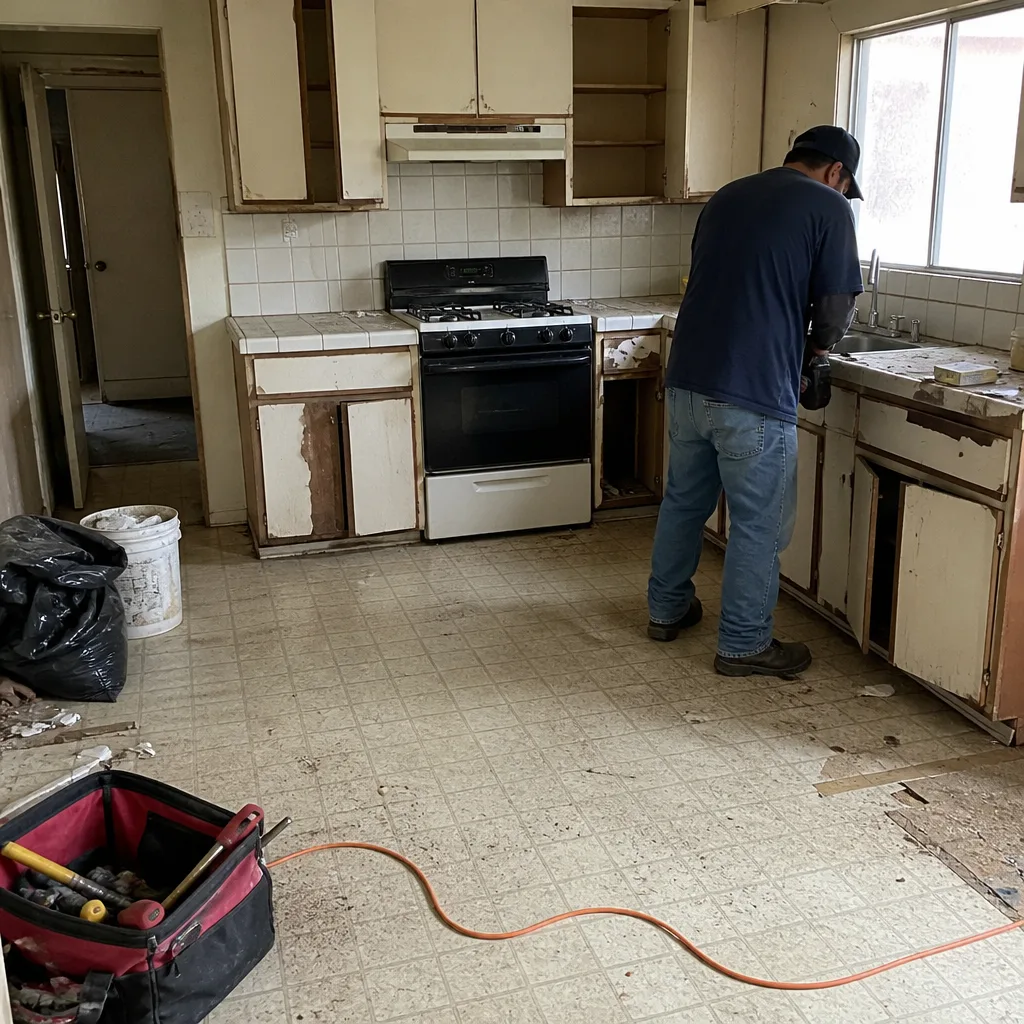 Before
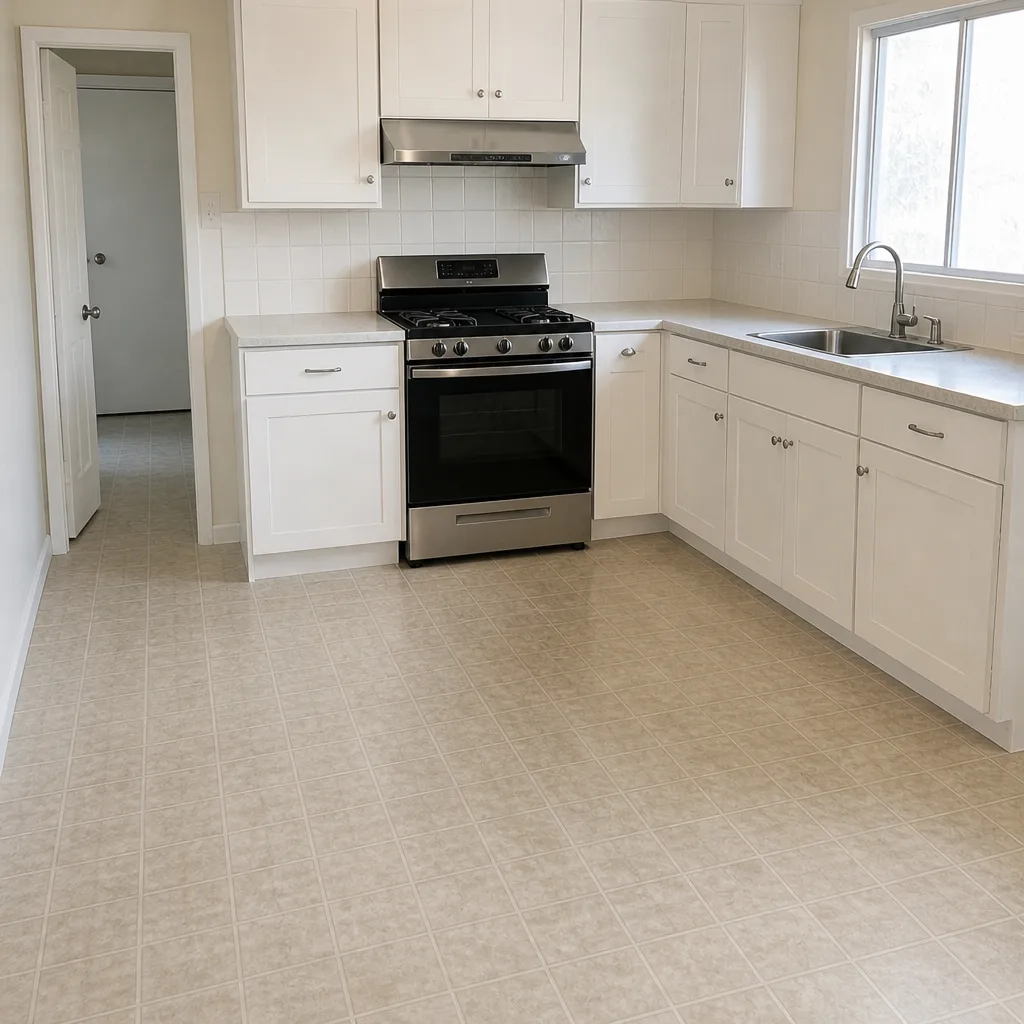 After
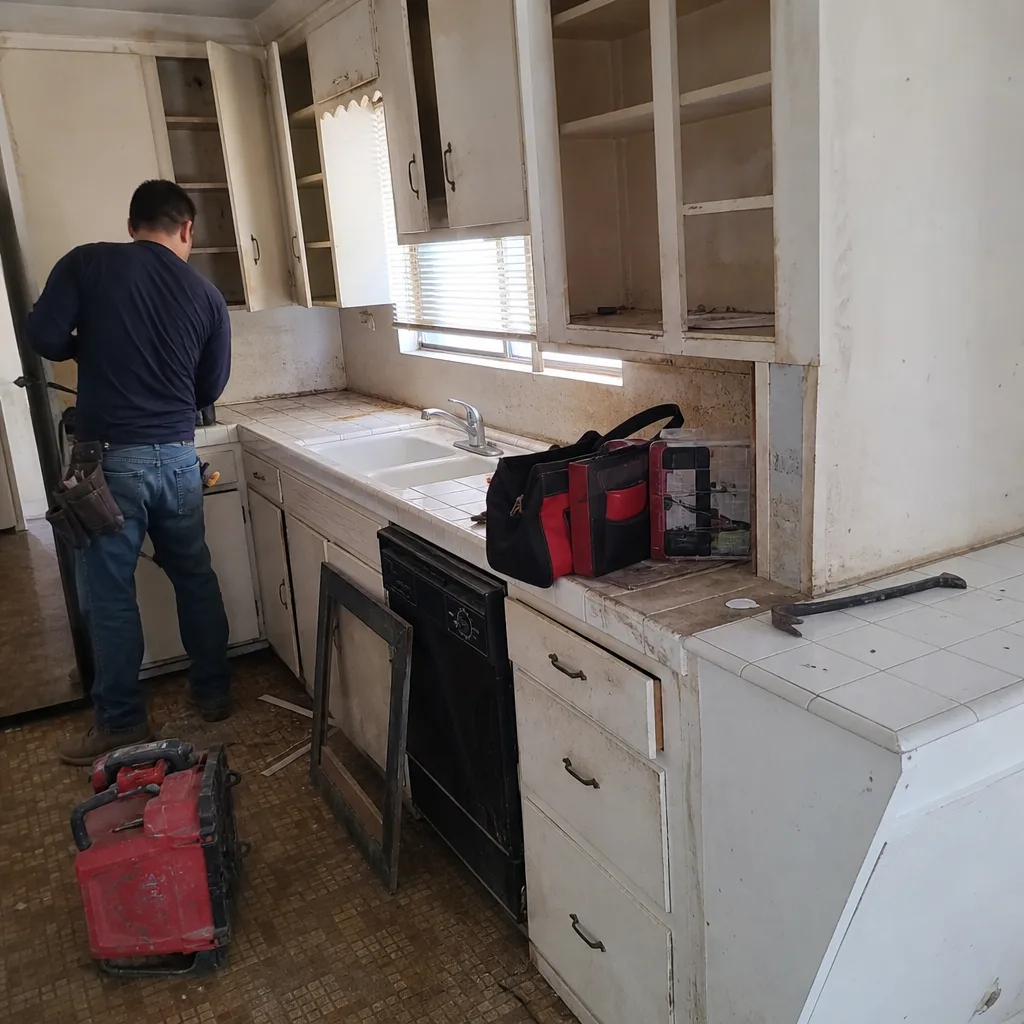 Before
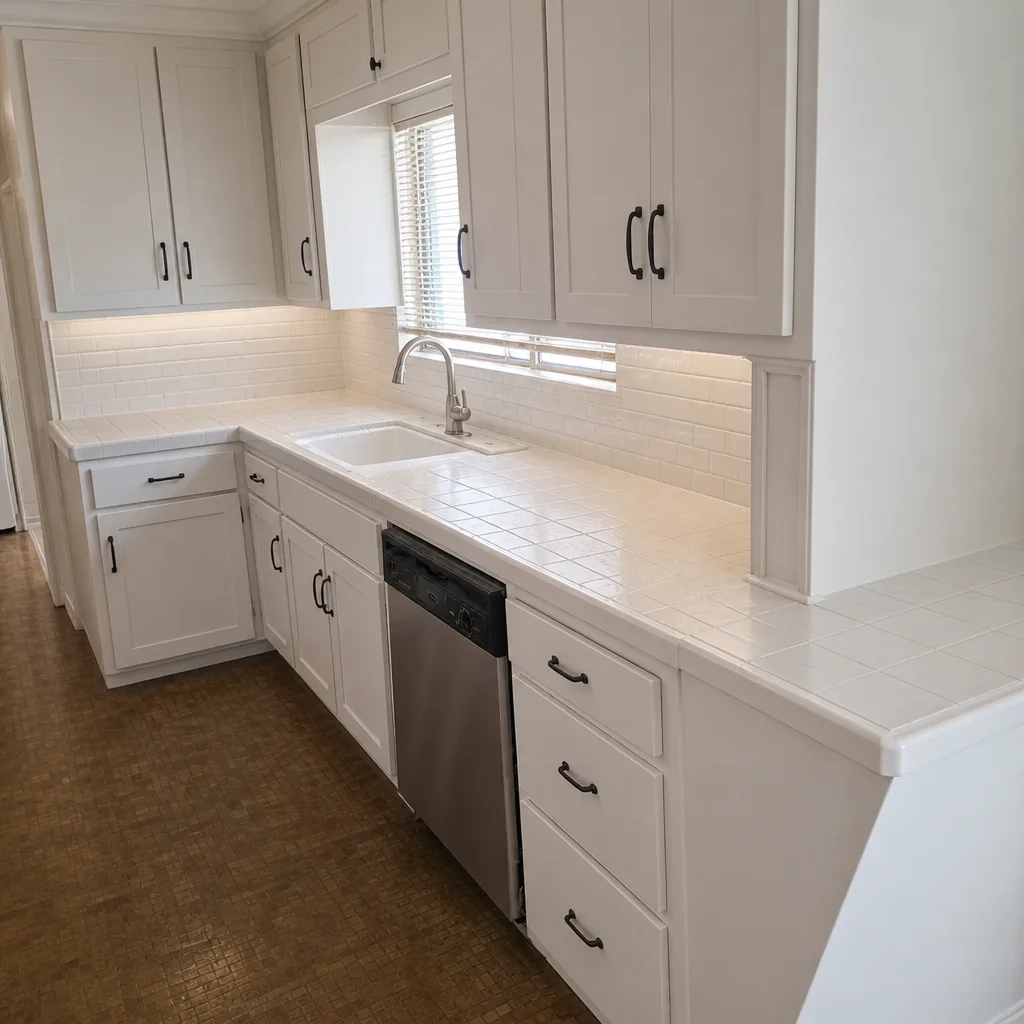 After
When to Call a Professional
Some problems you can diagnose and live with. Others need a licensed professional out to look before the damage compounds. Call a professional when you see diagonal cracks wider than 1/8 inch in an exterior wall or at the addition-to-house transition, when water is recurring after a previous repair, when your HVAC addition is more than five degrees off the rest of the house, when your project has stalled and liens are unknown, or when a passed inspection was clearly the minimum and the workmanship above it is questionable. These are the calls where a diagnostic visit costs a fraction of the cost of waiting.
Groundwork Construction Co. of West Covina offers free estimates in West Covina. We’ll walk the project, identify the real problem, and give you a written, line-item scope with fixed pricing. Call (844) 662-2335 to schedule. Live person, 24/7, no voicemail.
Frequently Asked Questions
Most moisture repairs, once the source is properly diagnosed at the flashing, window, or foundation transition, fall in the $1,800 to $6,500 range depending on how much drywall and trim has to be opened and replaced. The diagnostic walk itself is usually $200 to $500 and applies to the repair if you proceed. The bigger cost is patching the symptom and having the problem return, which is where homeowners end up paying twice. Call (844) 662-2335 for an exact quote, and the estimate is free.
Homeowner’s insurance typically does not cover contractor abandonment or a stalled project, because those are contractual and financial disputes, not a covered peril. Insurance may cover subsequent damage from weather or theft to an unfinished structure, but only if the policy covers it and the structure was properly permitted and secured. Your best protections are the contractor’s license status, their bond, and any written workmanship warranty. Call (844) 662-2335 for a free assessment of what your project needs next.
A typical attached addition in West Covina takes four to seven months from permit issuance to final inspection, and a detached ADU takes six to ten months, depending on plan-check cycles, utility coordination, and weather. The largest single variable is plan-check turnaround, which is why complete drawings and structural calculations save weeks. A contractor who quotes a shorter timeline without accounting for plan check is quoting an incomplete schedule. Call (844) 662-2335 to talk through a realistic timeline for your specific project.
Hairline cracks under 1/16 inch at drywall corners and seams are cosmetic and can be patched and repainted without engineering review. Diagonal cracks wider than 1/8 inch, cracks that grow over time, or cracks that appear at the addition-to-house transition warrant a structural engineer’s assessment before any cosmetic repair. Painting over a structural crack hides the evidence and delays the real fix. Call (844) 662-2335 and we’ll help you tell the difference on a free walkthrough.
Yes. Every addition and ADU project we take on is permitted through the City of West Covina’s building department before construction starts. Permits are pulled as part of the project scope, not as an add-on. Inspections are scheduled and passed before each phase closes, and you get the inspection record in your closeout package. A project without permits is a project that will complicate your future sale or refinance. Call (844) 662-2335 to schedule a free estimate and scope review.
Some contractors won’t inherit liability for another crew’s framing or foundation, which is a legitimate concern. The contractors who will take over a stalled project usually require a full structural review of completed work, a re-inspection of the passed phases, and a written warranty that covers the entire project scope, not just the new work. A company willing to back the whole project with a written workmanship guarantee is the one you want. Call (844) 662-2335 and we’ll walk your stalled project and give you a straight answer on whether we can take it over.
The Bottom Line
Home addition and ADU problems almost always trace back to a scope of work that was never specific enough. Moisture comes from flashing, rough openings, or foundation transitions, not from the drywall. HVAC comfort problems come from duct sizing and load calculations, not from the thermostat. Cracks that grow are structural, and cracks that stop growing are cosmetic. Stalled projects need a documented paper trail, a lien check, and a replacement contractor who will warrant the whole scope. And a passed inspection is a minimum, not a quality guarantee. The homeowner who walks a new addition with a real checklist catches problems before they become change orders, and the homeowner who insists on a written scope and a real workmanship guarantee avoids most of the disputes that fill the complaint boards. From foundation to finish line, that’s the difference between a project that’s done and a project that’s done right.
If you’re planning an addition or ADU in West Covina and you want a straight answer on your project before the first shovel goes in, or you’re trying to diagnose a problem in a project someone else built, call Groundwork Construction Co. of West Covina home at (844) 662-2335. We’ll walk the project, give you a written line-item scope with fixed pricing, and stand behind the work with our 730-Day Done Right Promise. A live person answers 24/7, no voicemail. Free estimate and design consult, upfront pricing with no surprises, 0% financing for 18 months, and $1,000 off projects over $10,000. Call today to get started.
Written by the team at Groundwork Construction Co. of West Covina.